¶ NA Mazda Miata Tachometer
¶ Requirements
The KE LED Tachometer is specifically designed for the 1990-1997 NA Mazda Miata and is only compatible with these model years. It features a plug-and-play design, making it compatible with both the stock wiring and aftermarket ECUs.
¶ What's in the box
- NA Miata LED tachometer
- Custom tachometer cable
- x1 nylon screw
- x2 stainless steel screw
- x3 retaining washers
¶ Installation
- Remove the OEM instrument cluser.
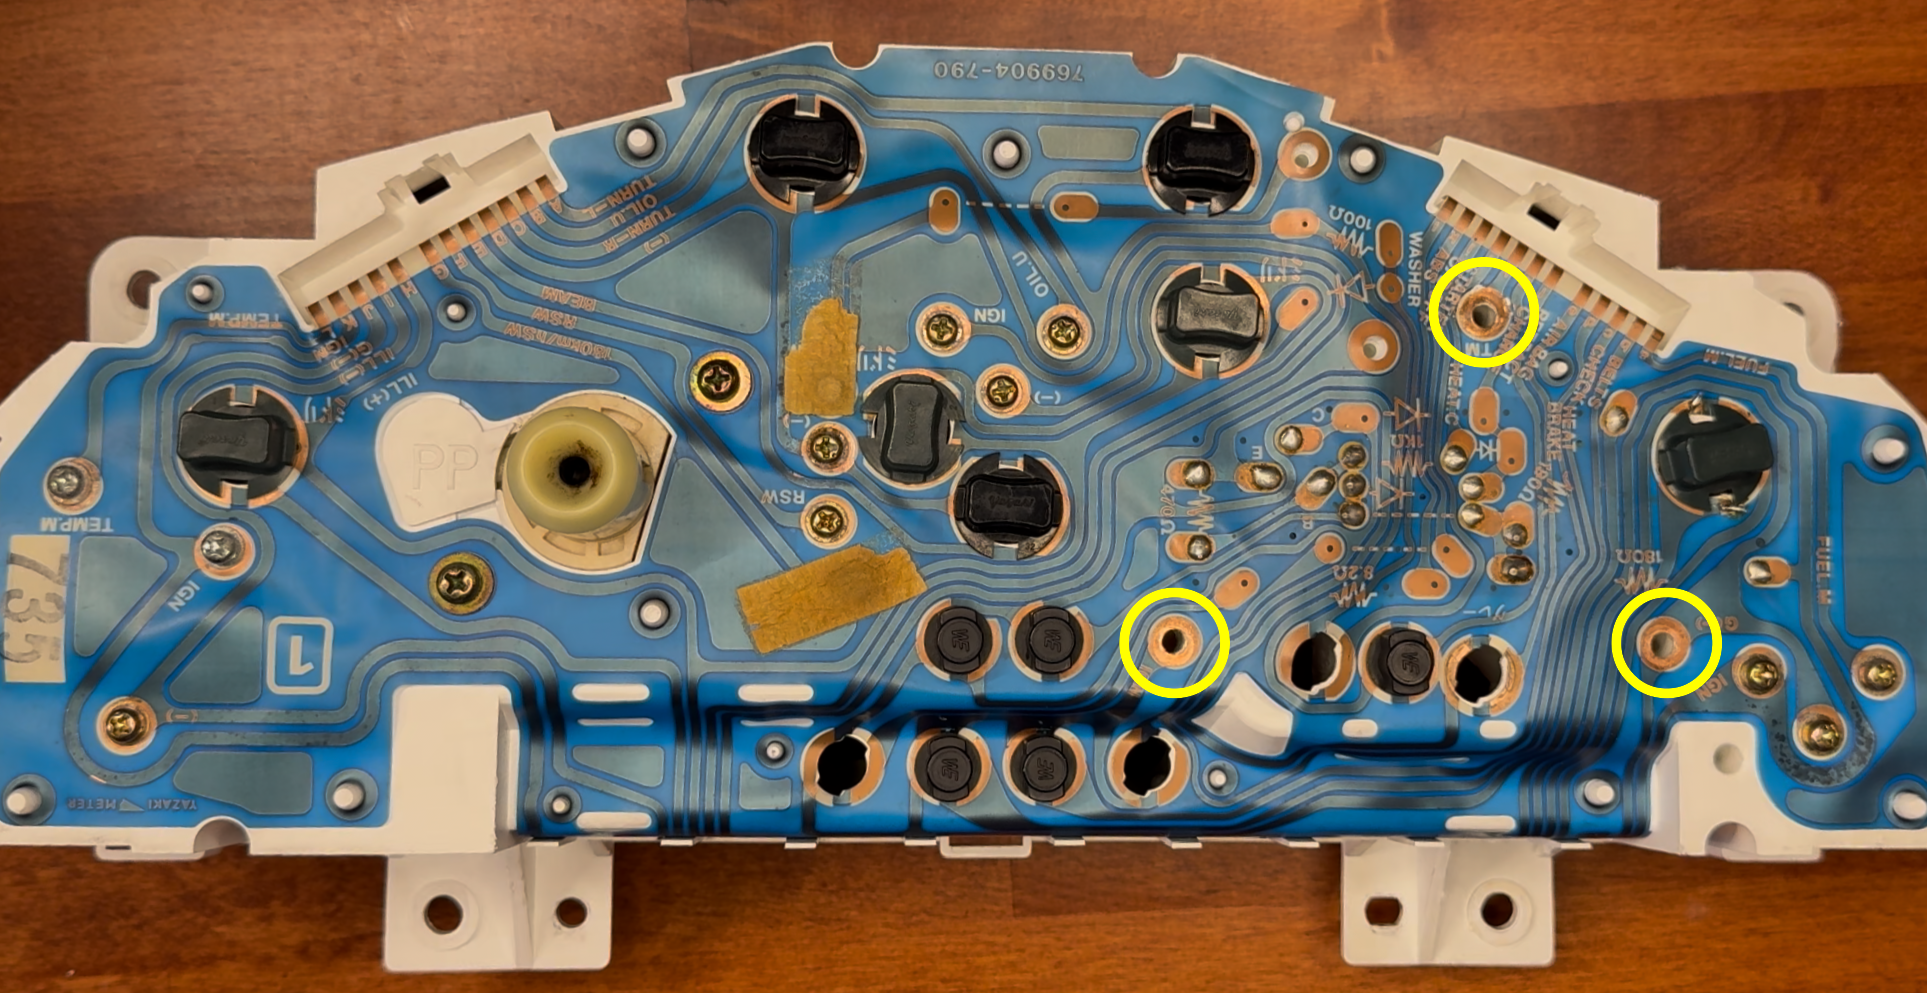
- Removew the stock tachometer by unscrewing the Ground, Ignition and Tach screw.
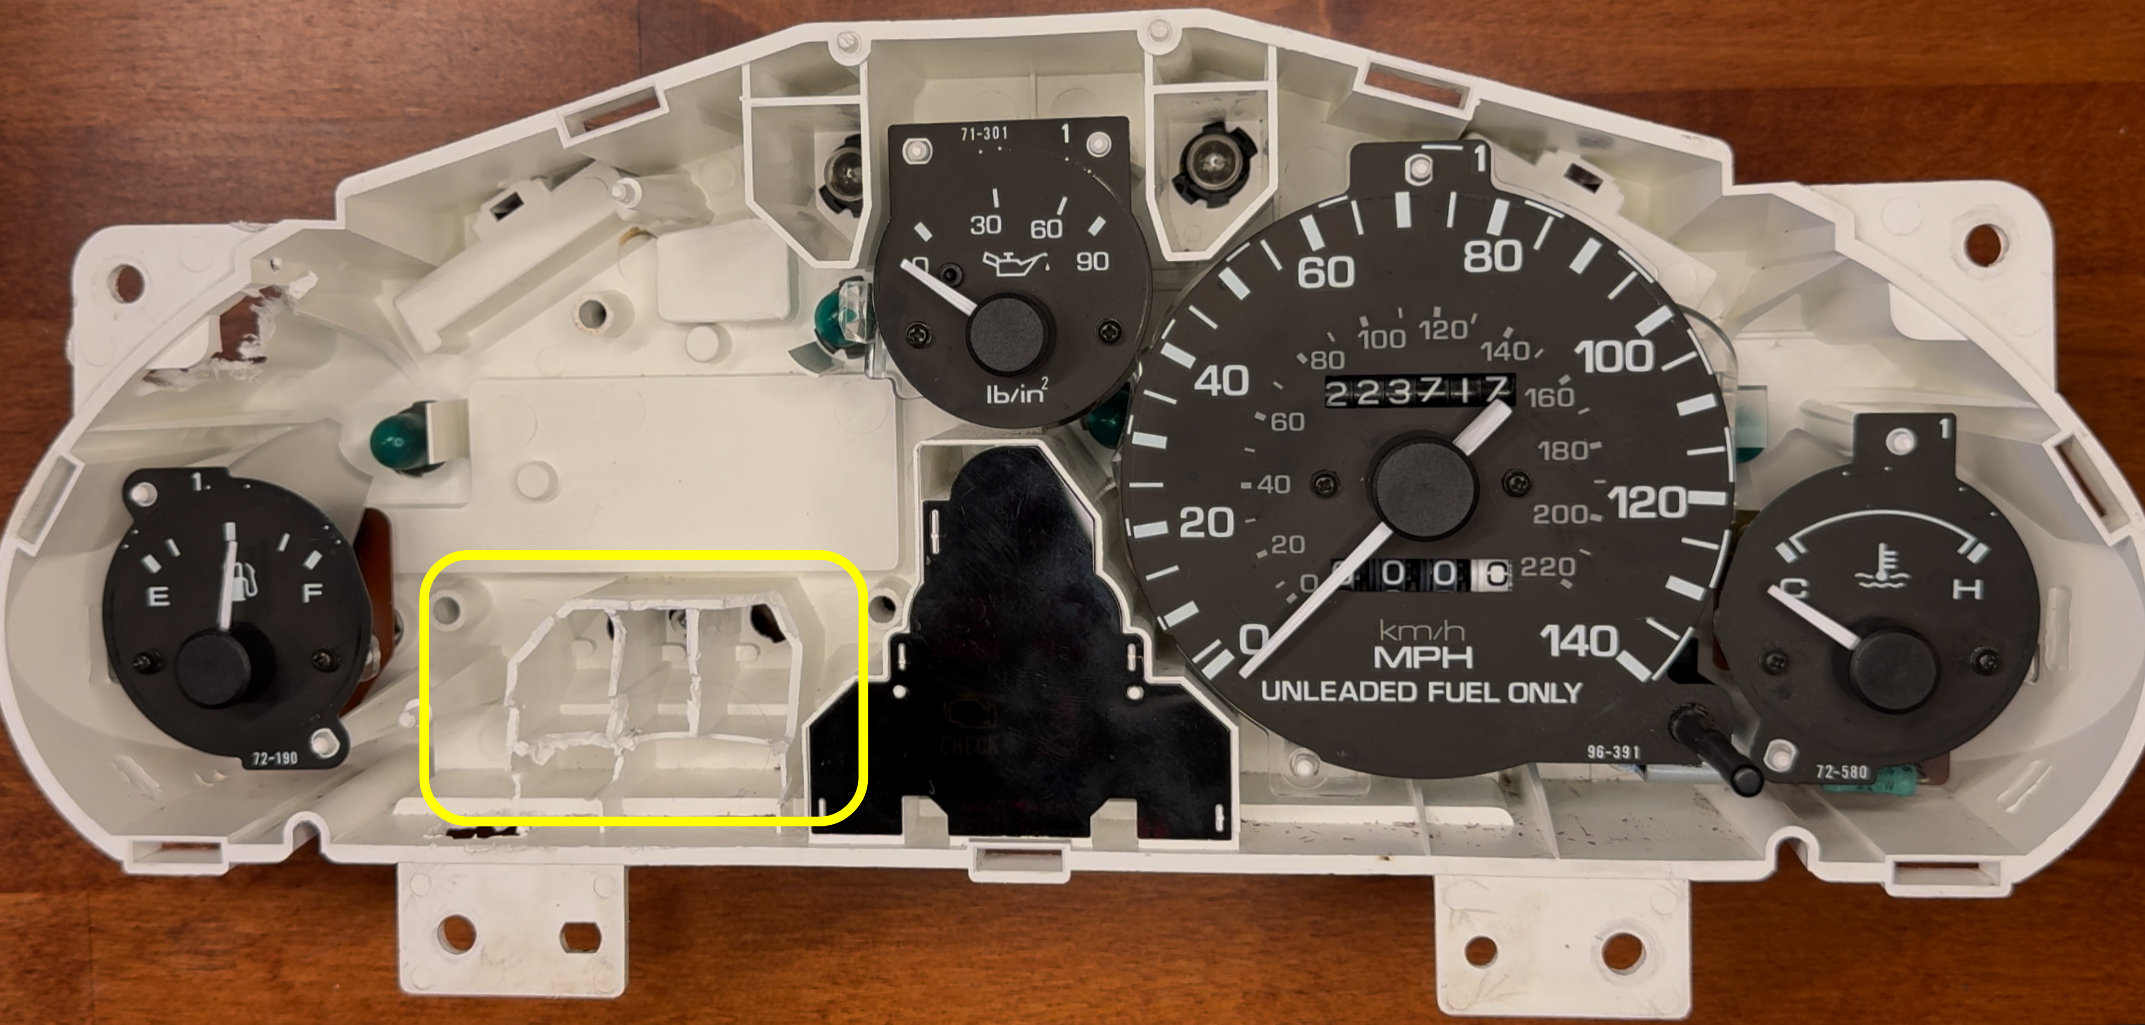
- Once the stock tachometer is removed trim the instrument cluster plastic using tools such as wire snips, pliers, dremel, etc..
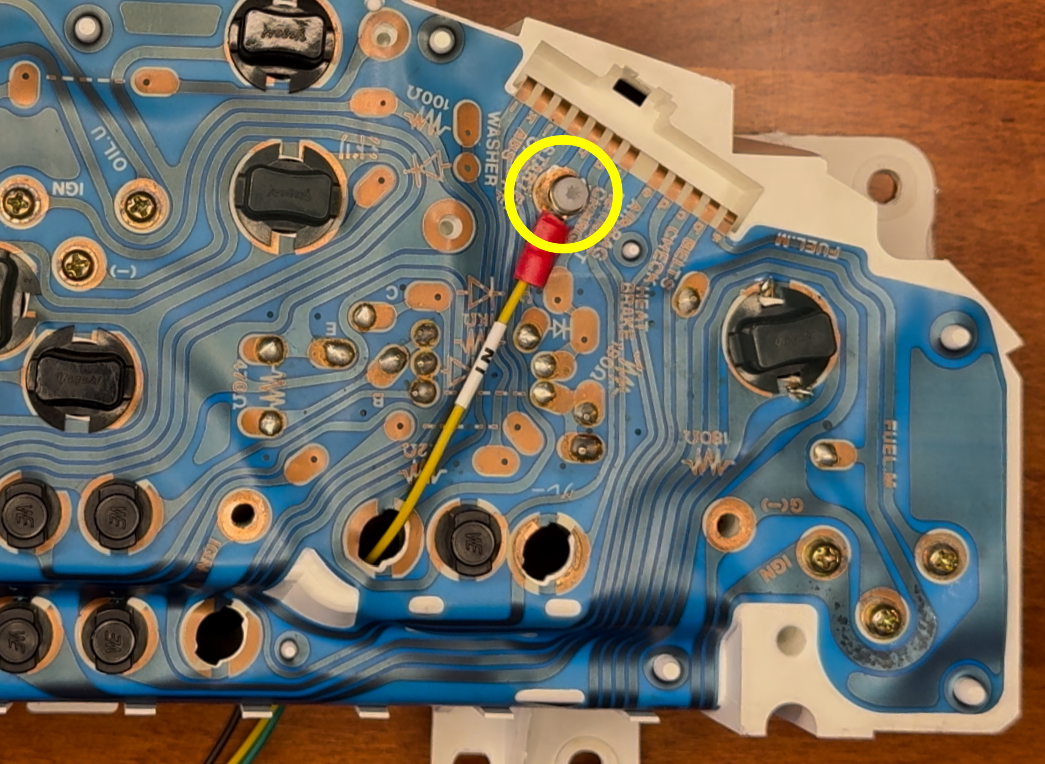
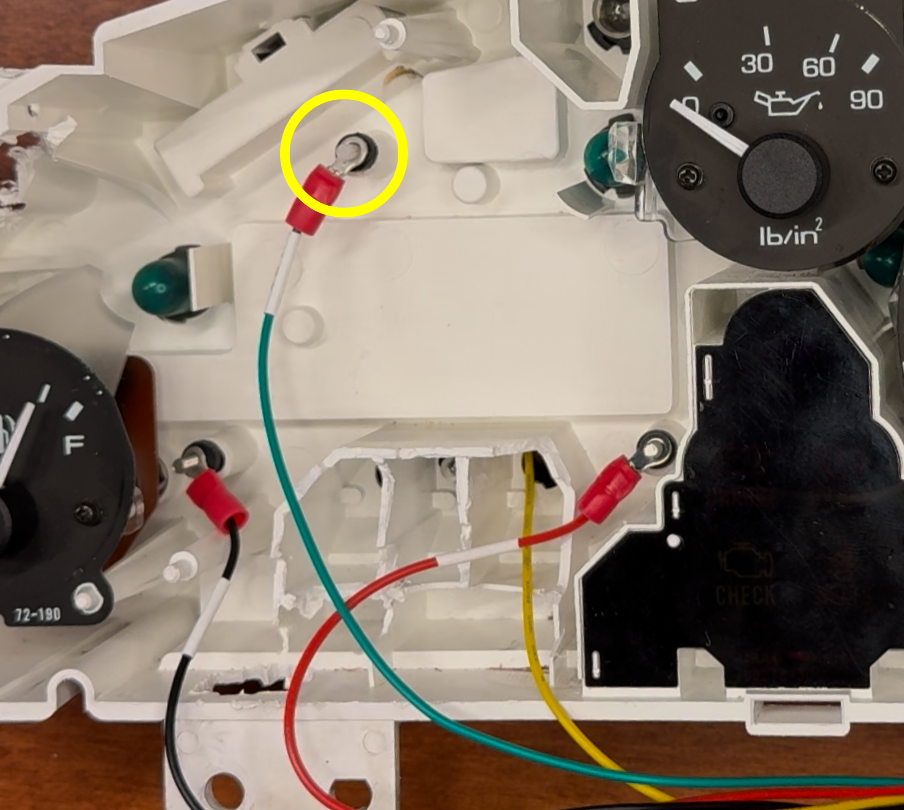
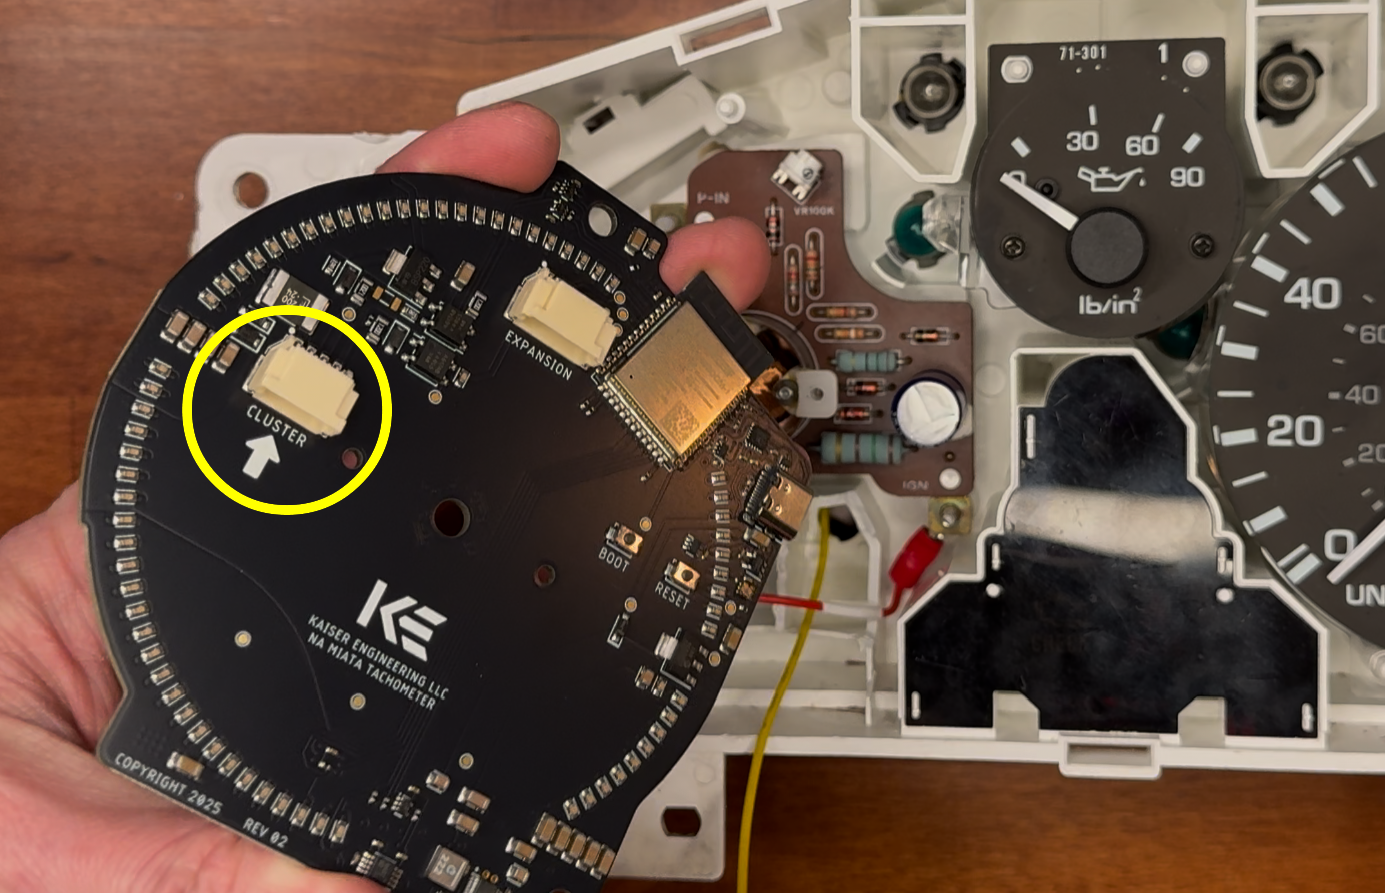
- With the supplied tachometer cable connect the "IN" (yellow) wire to the Tach signal on the back of the instrument cluster. You MUST use the provided nylon screw w/washer for this signal only.
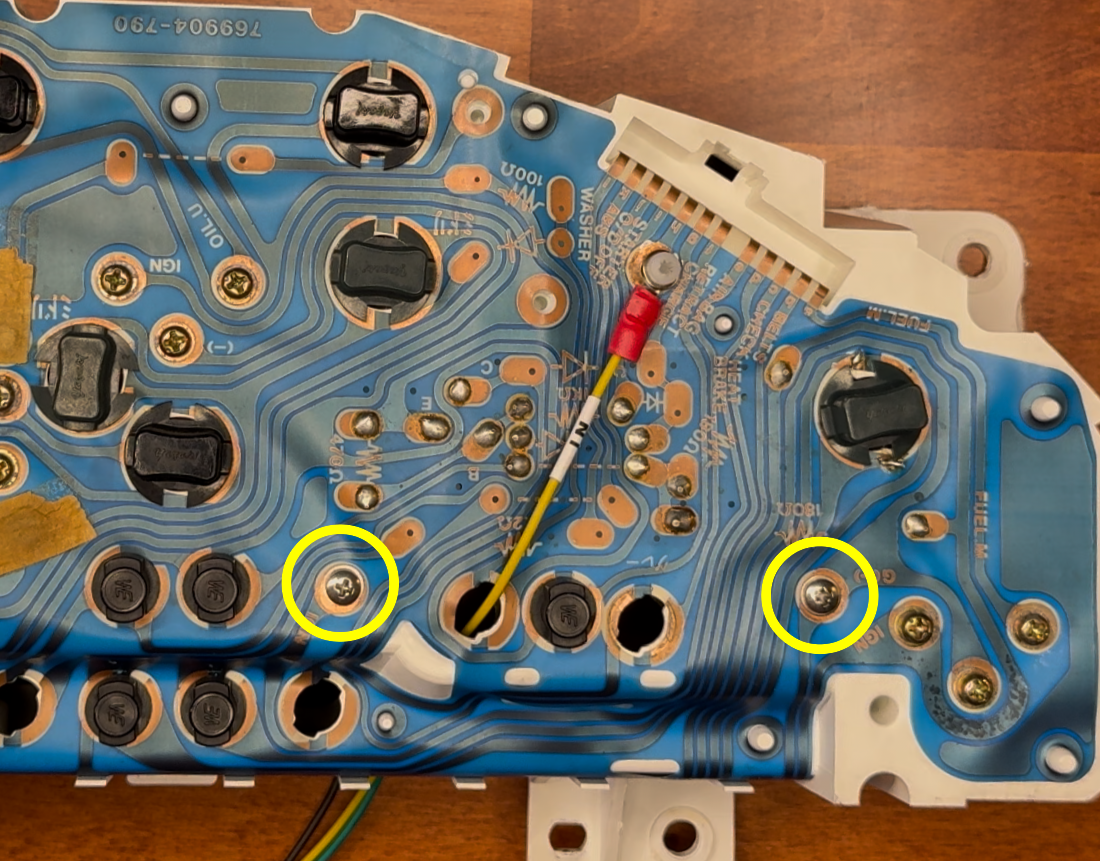
- Place the other two metal screws w/washers in the Ground and Ignition screw holes. No terminals need to be connected yet.
- Place the self-retaining washer on each screw inside the instrument cluster.
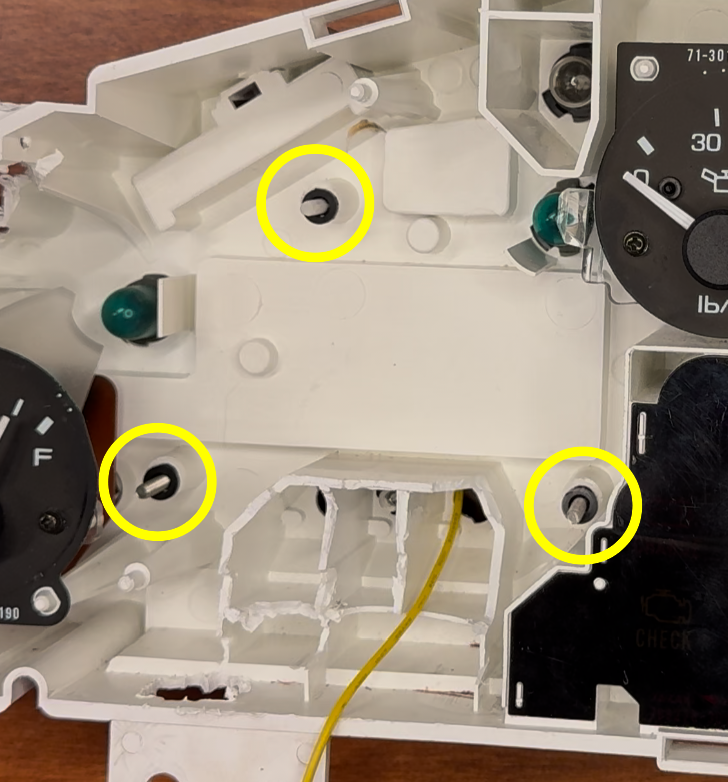
- Connect the "OUT" (green) wire to the Tach signal on the inside of the instrument cluster.
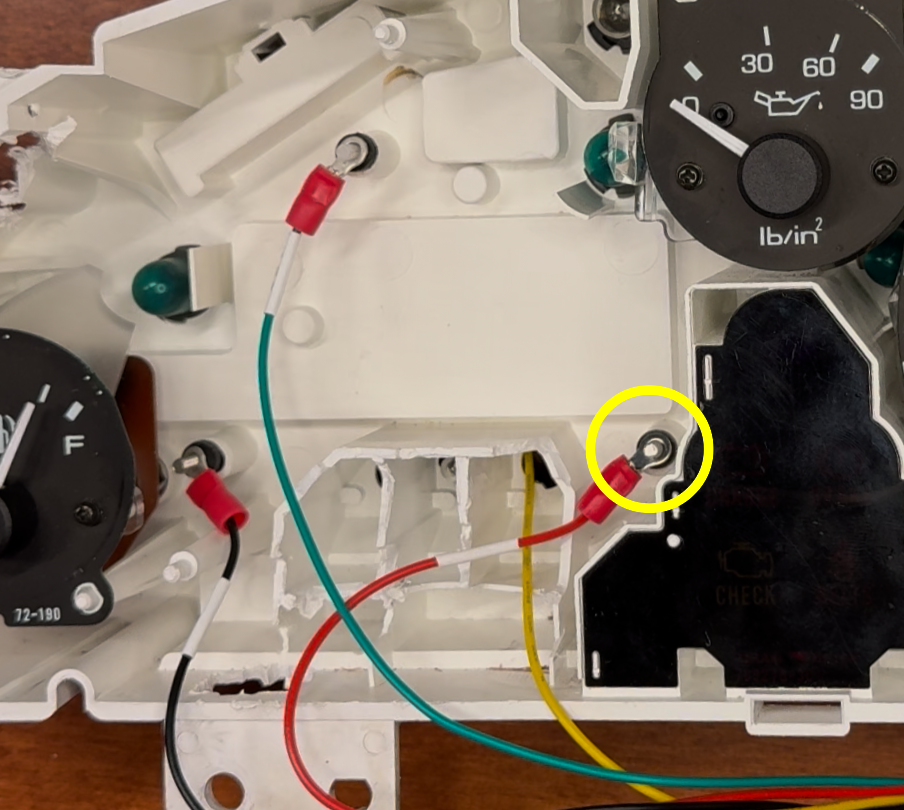
- Connect the "IGN" (red) wire to the IGN signal on the inside of the instrument cluster.
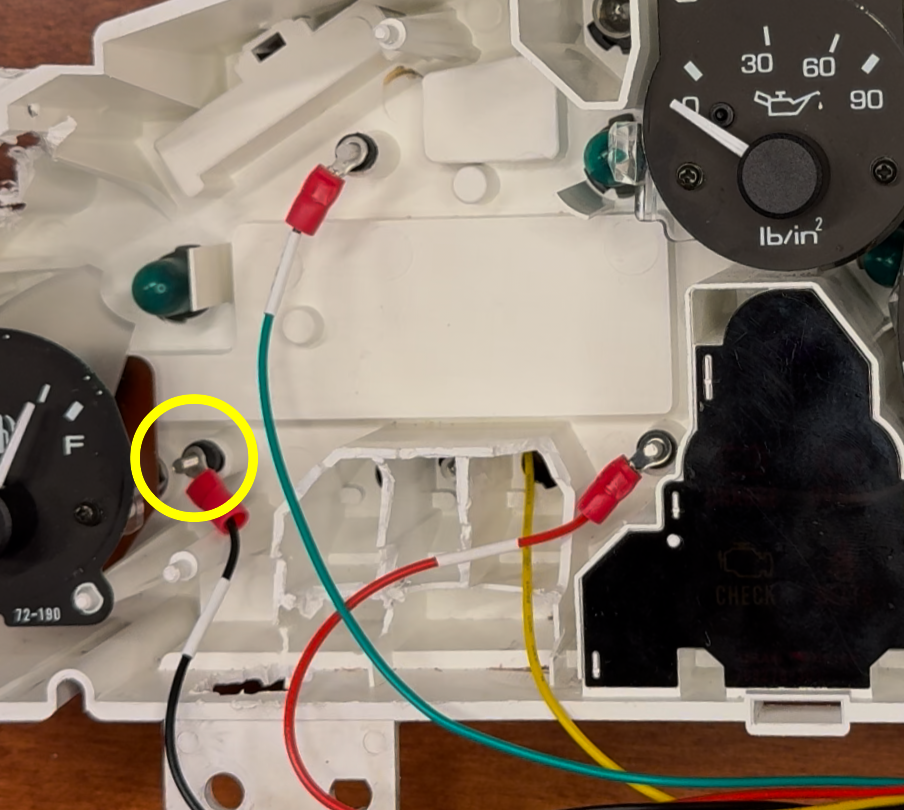
- Connect the "GND" (black) wire to the GND signal on the inside of the instrument cluster.
- Screw the stock tachometer hardware back into the instrument cluster and make sure all the wires stay connected during the install process.

- Plug the cable into the NA Miata LED tachometer cluster input.
- Using the stock black screw, reassble the tachometer.

- Reinstall the instrument cluster into your vehicle without attaching the cover. Turn you Miata on in Accessory mode, the engine should NOT be running.
- Log into the tachometer's Wi-Fi, the SSID is
Miataand password isAlwaysTheAnswer. Using a webbrowser navigate tomiata.local. Go to the navigation tab and move the 4000rpm slider to put the unit in calibration mode. See troubleshooting if you are having issues at this step.

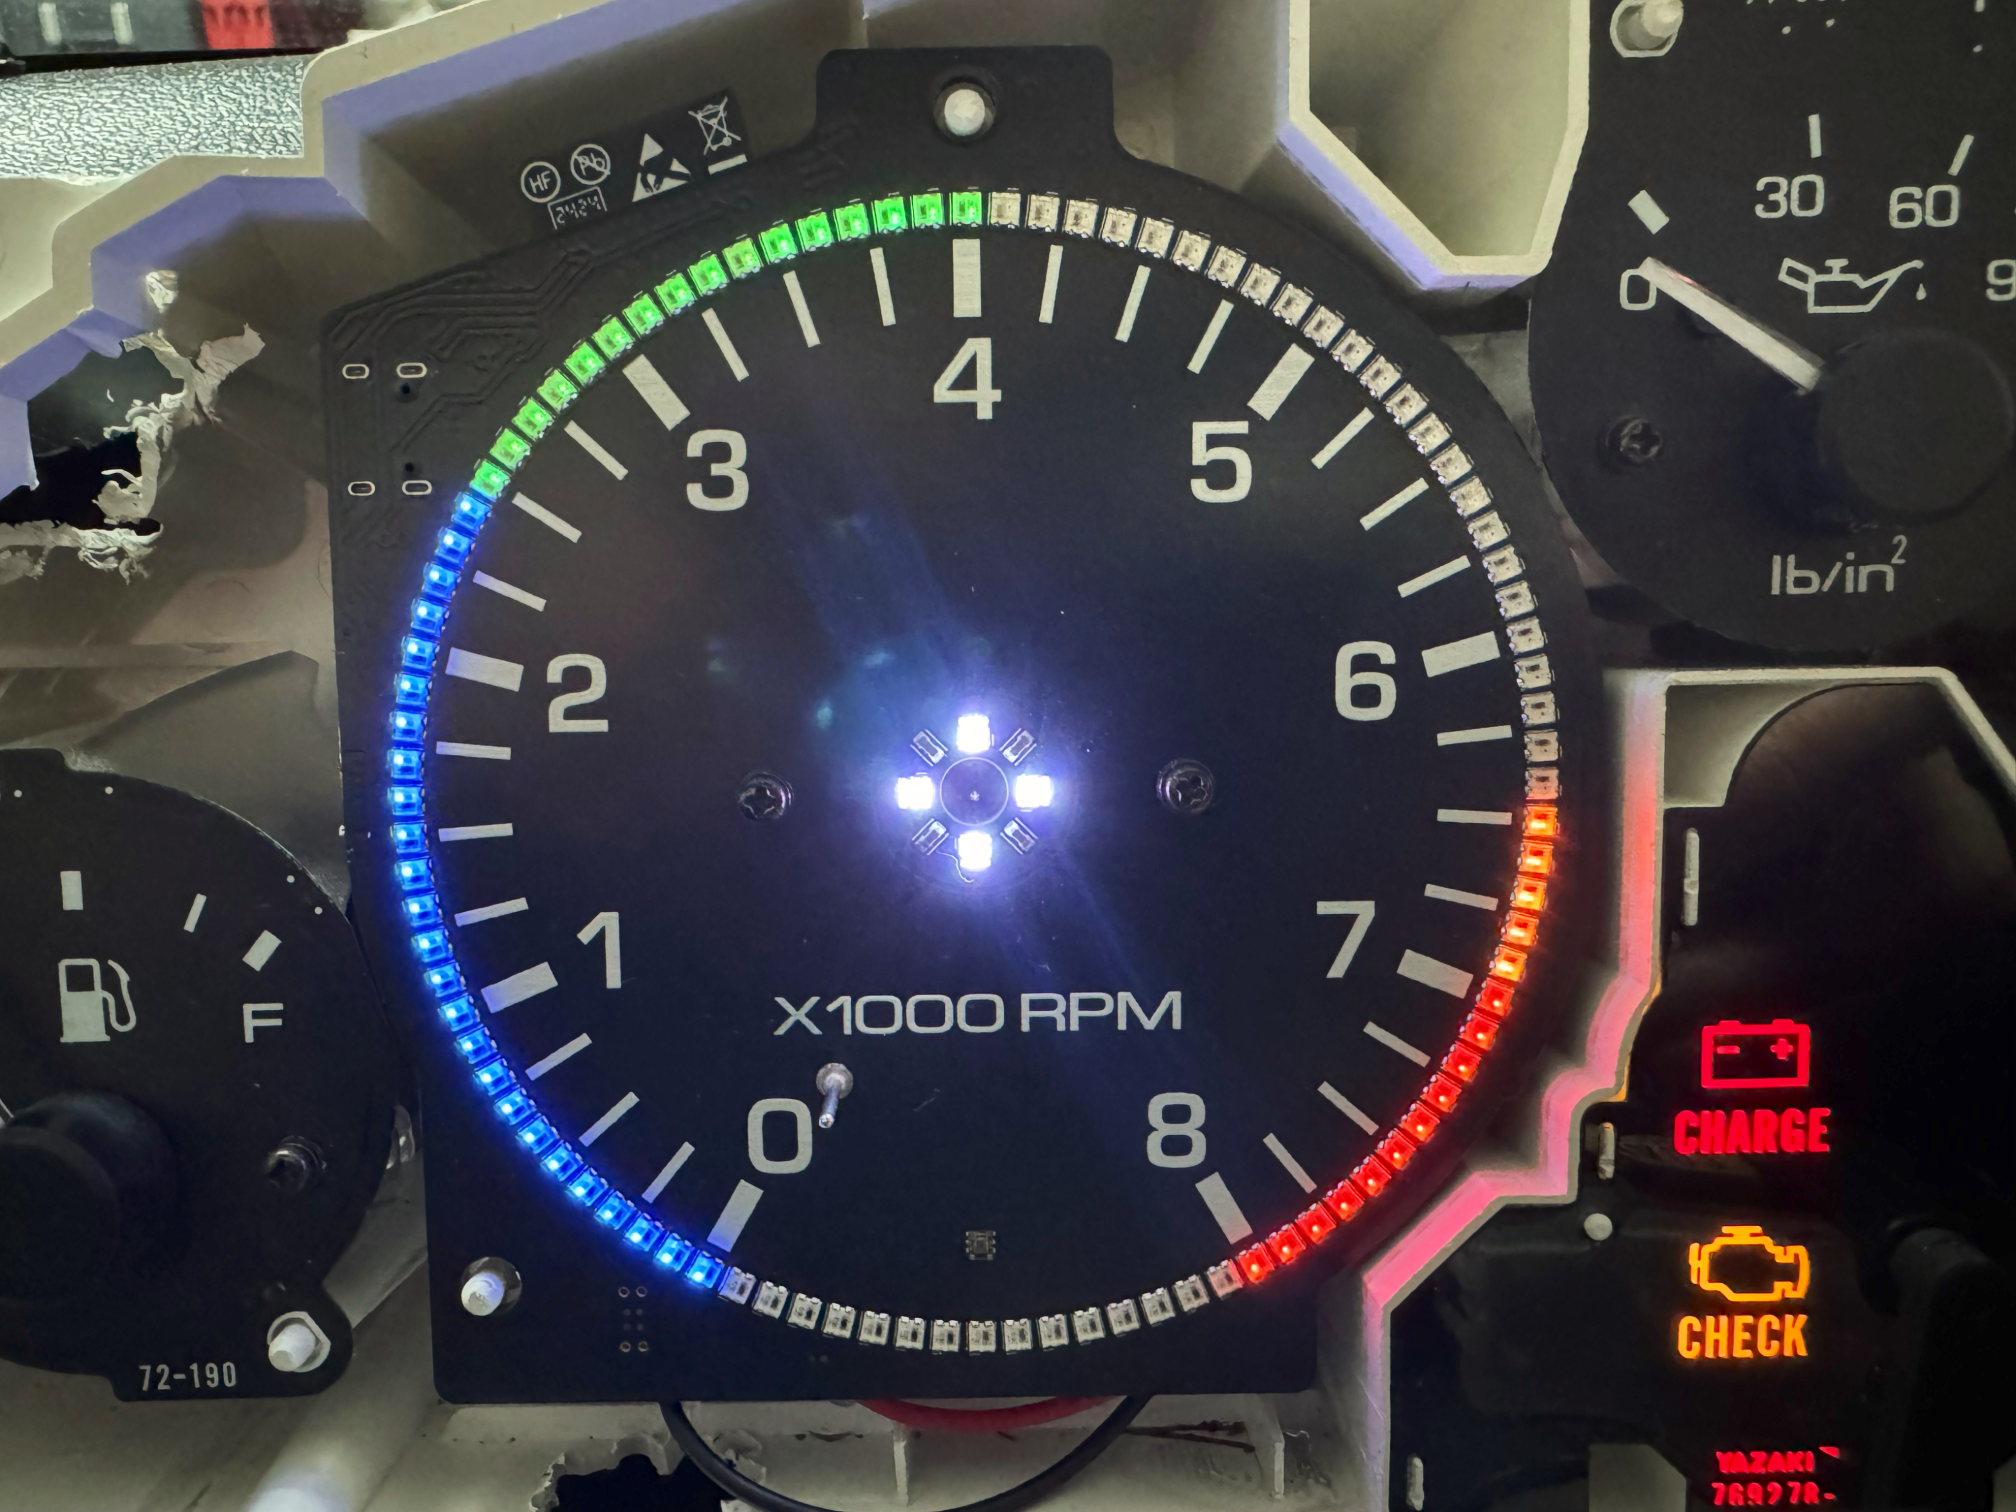
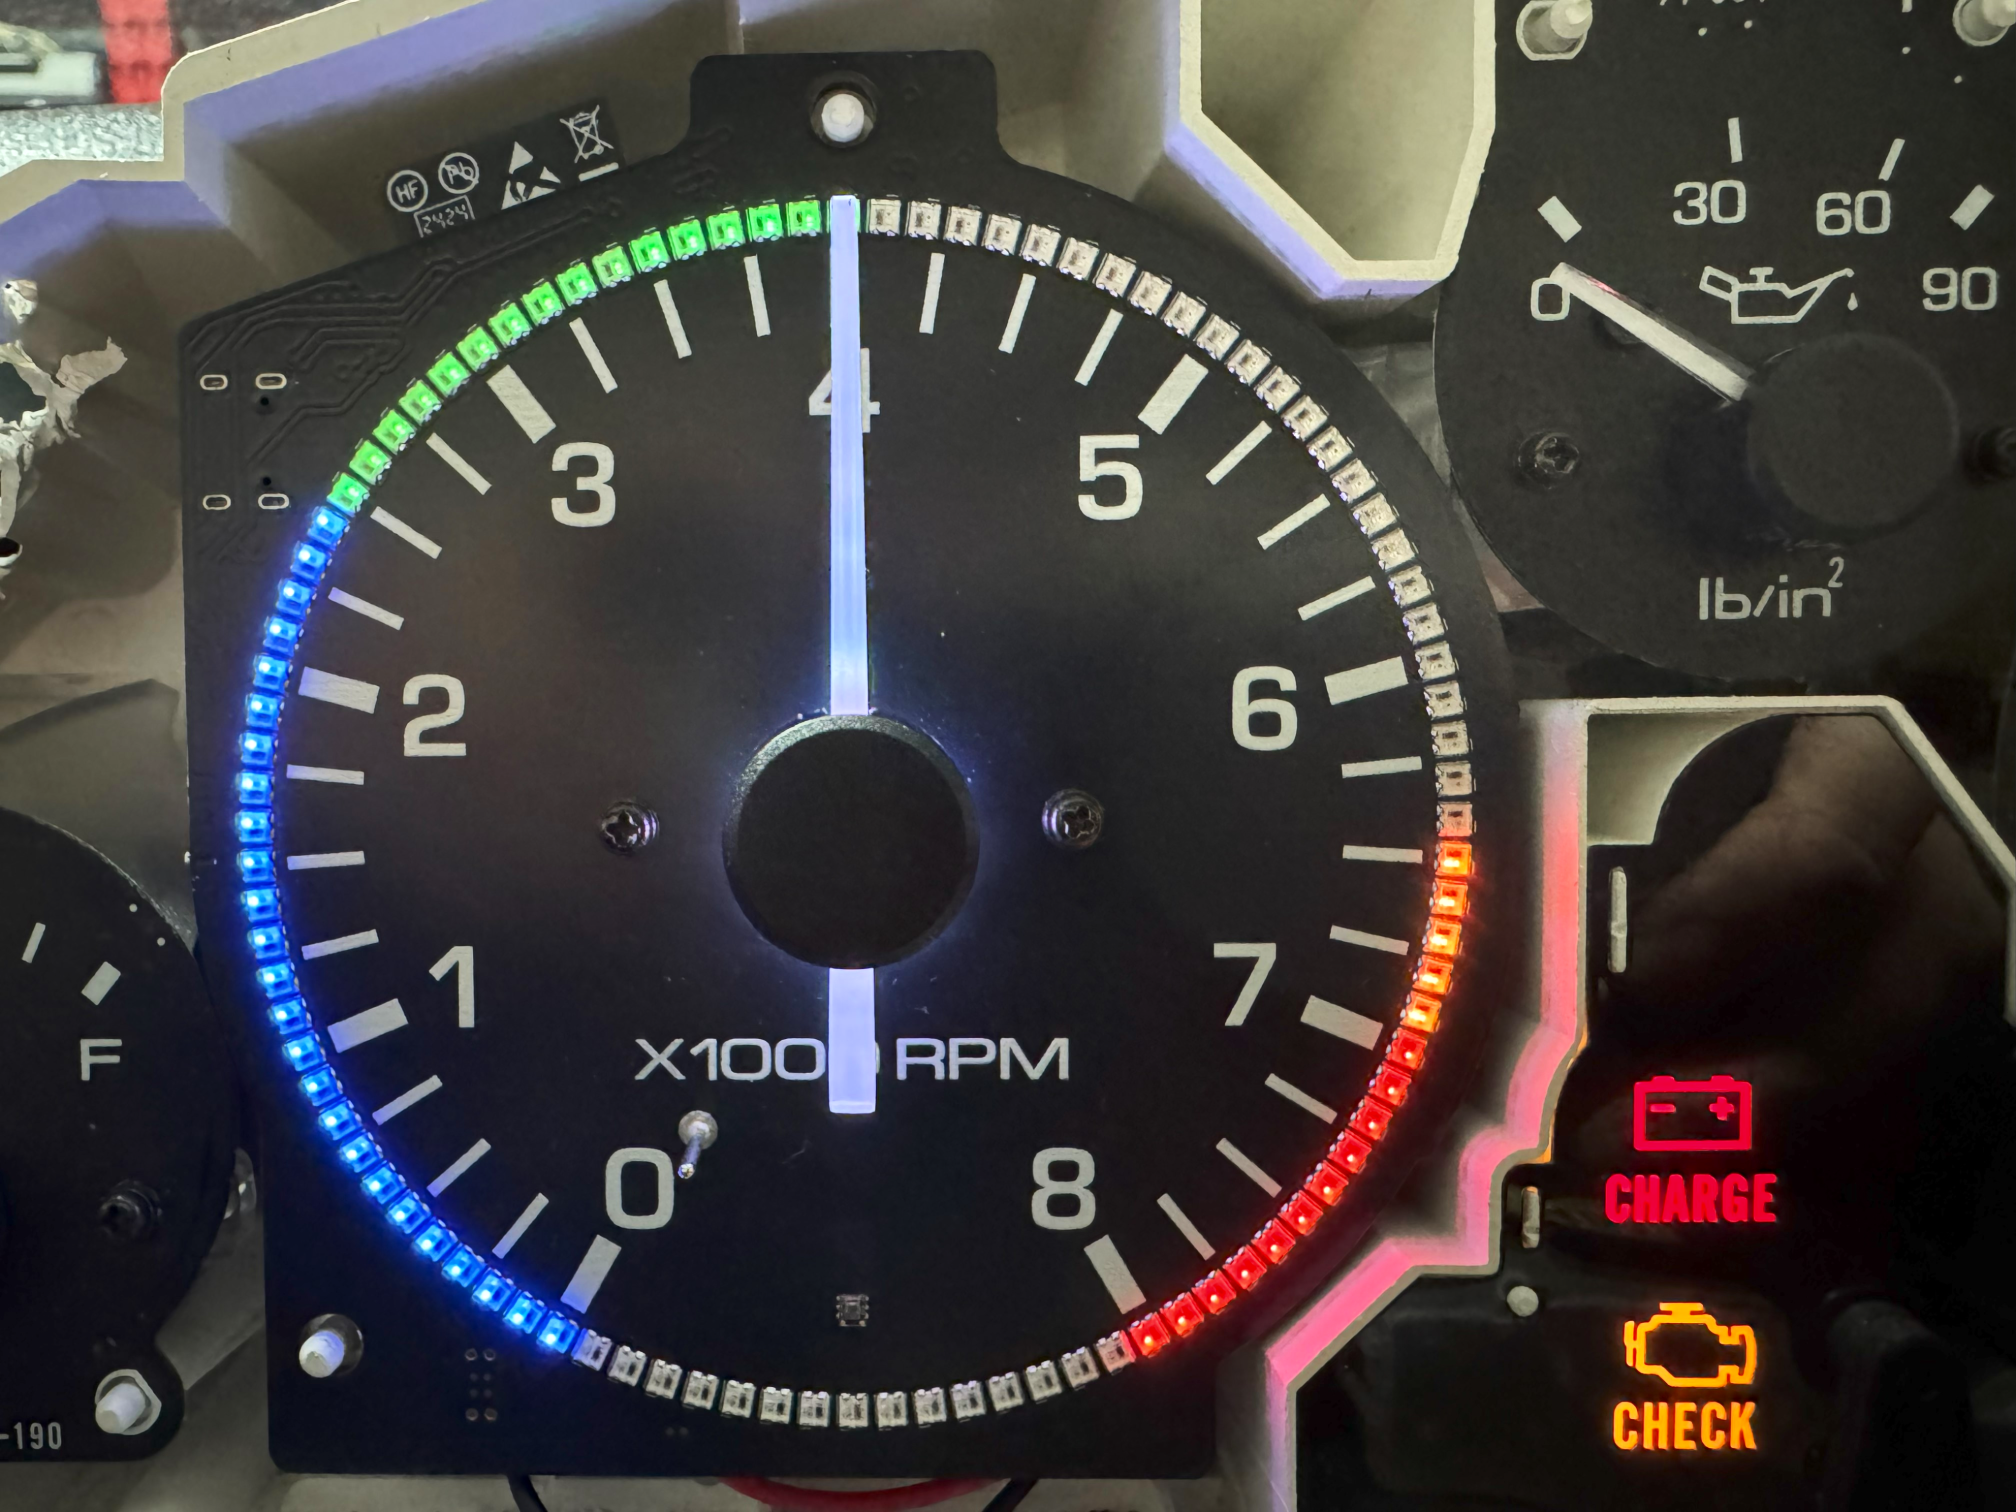
- The LEDs on your tachometer should now be pointing to 4000rpm. You can now attach the needle to the tachometer at the 4000rpm position. Don’t worry about getting it exactly right, as we’ll calibrate it in the next step.
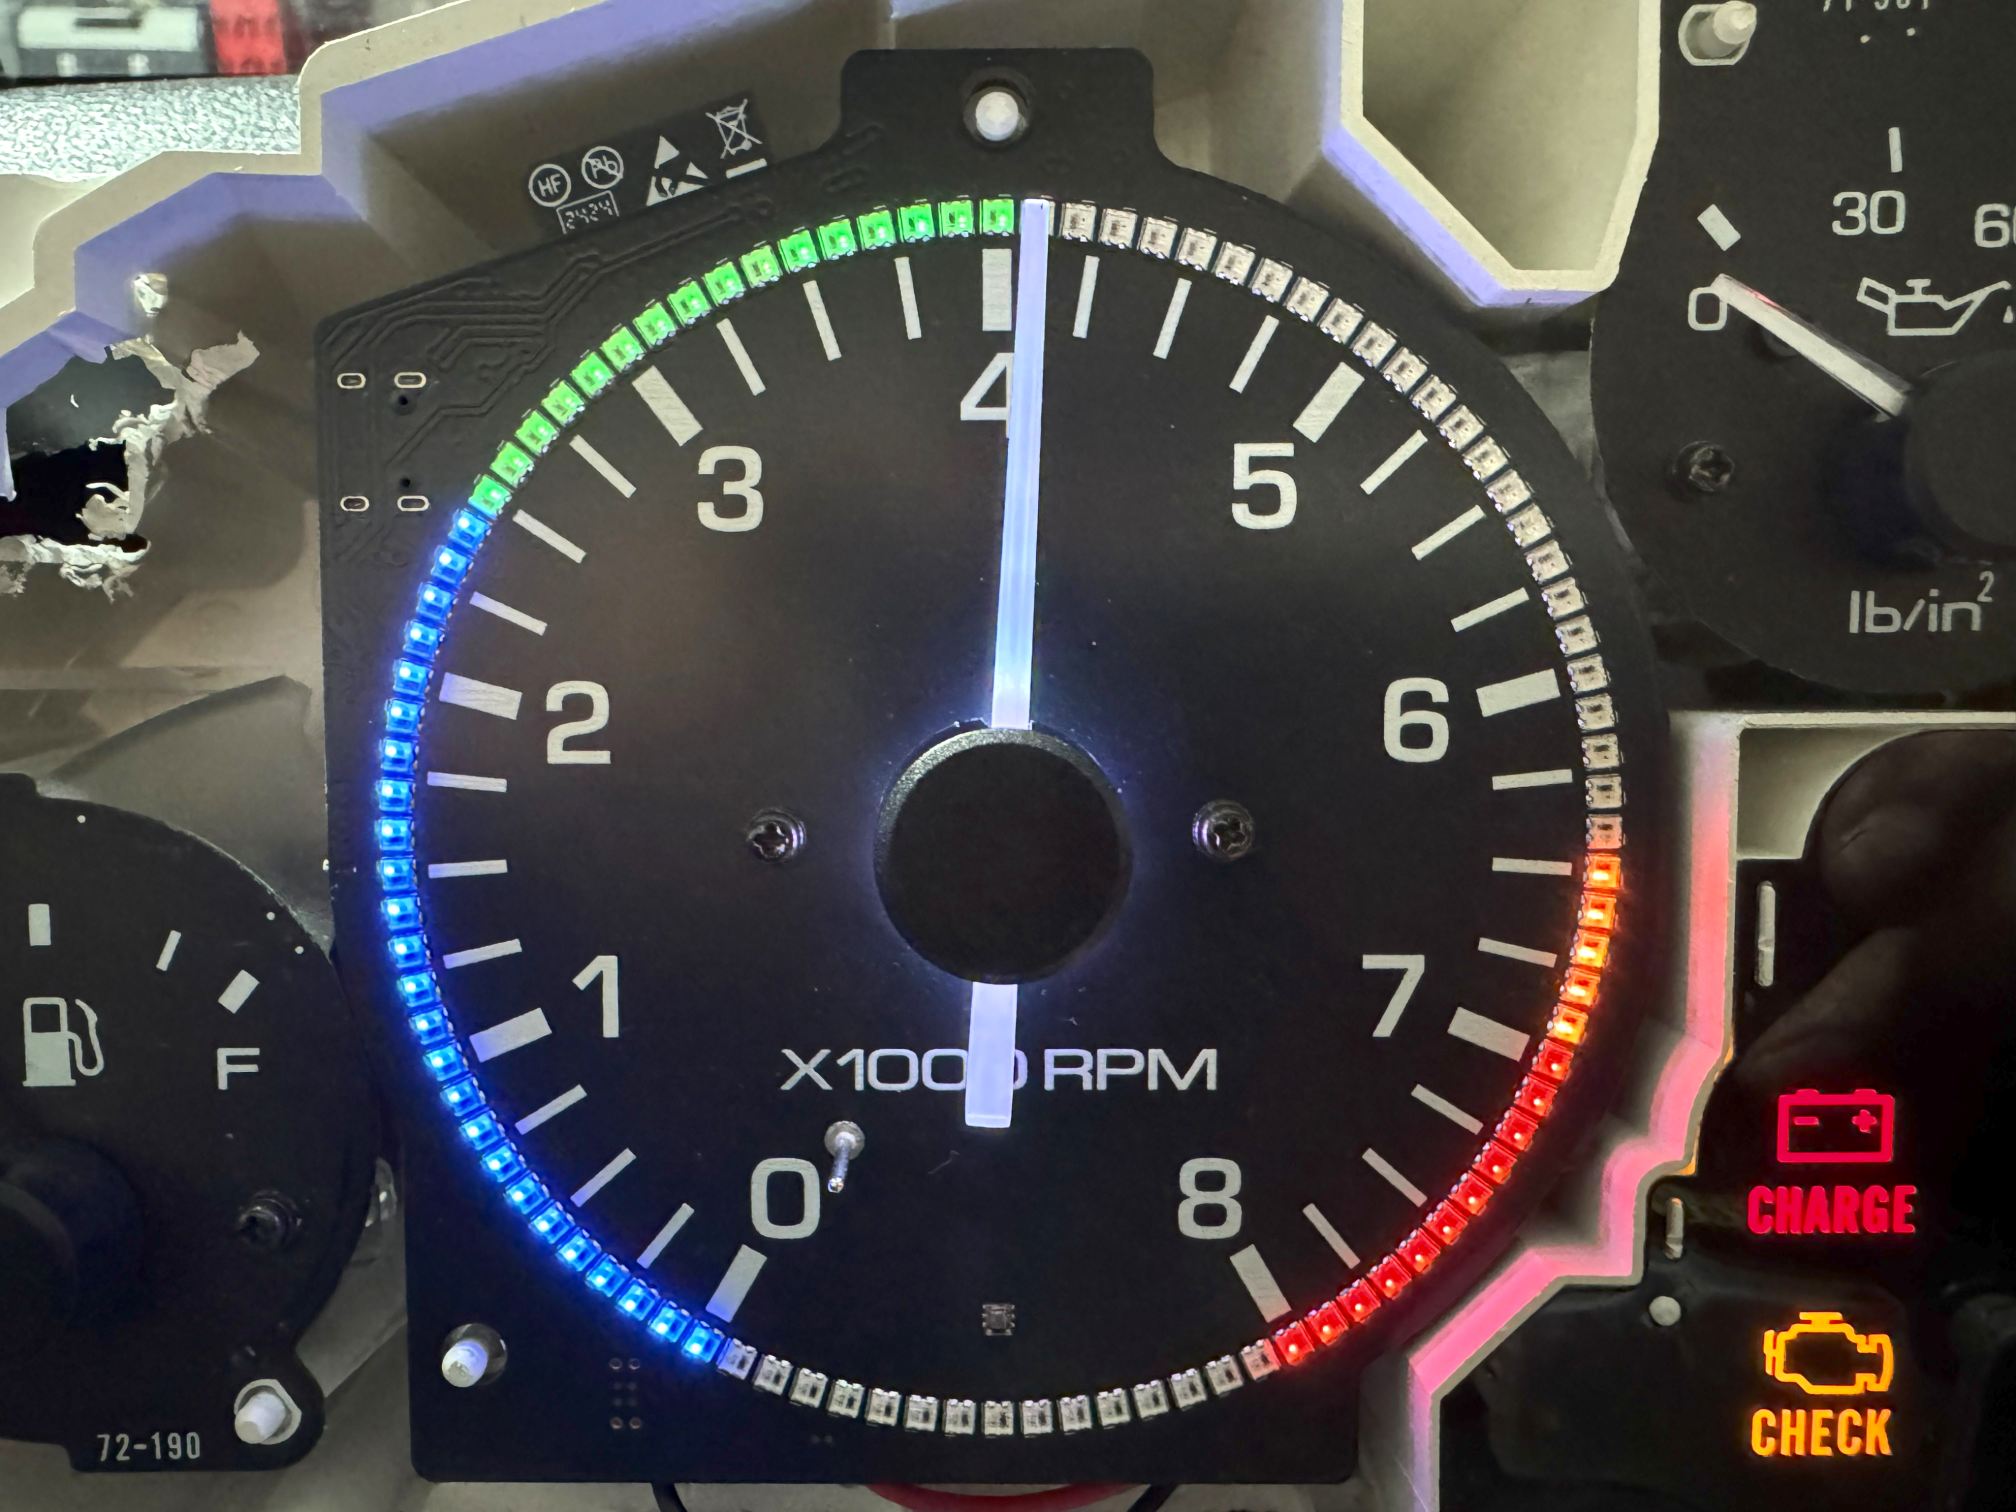
- Now using the webapp slider adjust the 4000rpm slider until the needle is aligned with the 4000rpm on the tachometer. Once in place click SAVE.
- Repeat this step for all rpm values and click SAVE for EACH rpm increment once alignment is complete. Note, the save button should be greyed out if there are no pending changes.
- After the calibration is complete you can turn your vehicle off and then turn it back on with the engine running to verify eveything is working as expected. If so, setup is complete and you can reassemble your instrument cluster. If not, please reach out to us for assistance.
¶ Customization
- Log into the tachometer's Wi-Fi, the SSID is
Miataand password isAlwaysTheAnswer.
If prompted stay connected even if data is not avaliable.
- Using your device's web browser navigate to
miata.local. Note that on iPhone you need to open a new tab, otherwise your phone will attempt to load the whatever is on the current tab and will not work. This most likely applies for Android devices as well.
¶ Firmware Updates
Do not disconncet Wi-Fi or turn off power during firmware update.
¶ Troubleshooting
¶ Wi-Fi slow or not connecting
- The tachometer is designed to be compact and easy to install. However, its Wi-Fi functionality may be limited and slower in areas with a high concentration of networks. To improve performance, it's recommended to connect to the device in a location with minimal Wi-Fi interference, such as a parking lot.
¶ Webapp will not load
- Verify that you are connected to the
Miatanetwork - Ensure your device does not automatically switch to celluar if data is not avaliable on the Wi-Fi
- Open a NEW tab when trying to navigate to
miata.local. Starting from an already open tab will cause your device to try and load the current page, which will not work.
¶ Day and Night mode change randomly
- The LED tachometer features a light sensor on the back, designed to detect backlighting in your instrument cluster. However, if the cluster lacks a shroud, external light may trigger night mode. In the web app, you may need to adjust the
Automatic Dimmingsetting toFront Sensor OnlyorOff.